Home » boun-sing ideas » Page 3

Category: boun-sing ideas

Weekend Getaway Retreat

I’m completely smitten with the little hideaway we found on HomeAway! If you were to talk to me in person about our weekend trip this week, you would certainly hear excitement come through in my voice. It was completely perfect in all the ways that I was hoping. It was isolated, in the woods, charming, simple, and close enough to home that if Hubster was called in to work, we could have driven separately. We were also close enough to a few small cities for gas stations and grocery stores when we needed them.

The cabin’s backyard!!!!

To give you an idea of our seclusion, the dirt driveway that took us back to the nestled cabin itself was 1/2 mile long. Oh yes! And one night, the road and ditches were lined with deer galore.

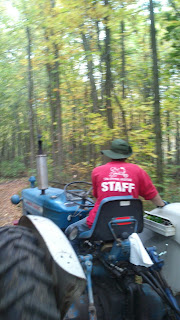
The property came with a grass airport landing strip, which we were allowed to roam, and miles’ worth of walking trails. Ponds, abandoned buildings, assorted birds, animal tracks, deer trails and all kinds of things greeted us on our hikes.

abandoned outbuilding

The cabin itself was the cutest little log cabin. We slept up in the queen-sized bed in the loft while Peanut camped out on the pull-out couch. We had a small kitchen at our disposal and a little bathroom. Just enough creature comforts while still feeling like we were truly getting away from it all. Just imagine the smell of bacon and eggs on the hot plate every morning…

View up to the loft

Loft ladder
Our queen-sized bed and skylight

Cutest little rustic details
Small cabin kitchen
Even the 12WBT series that I’m participating in had many recipes that were suitable for microwave or hot plate cooking, which was all we had, and all we needed. Turkey dogs, sandwiches and eggs with mushrooms were on the menu and completely 12WBT approved–and approved by my guys!

I soaked up hot chocolate and woodpecker watching on our balcony…I mean seriously, a balcony off of our loft bedroom! Can we get any closer to heaven?

Can you spy our two little birdie friends? I was laughing
watching them play through the birch trees like teenagers.

We even had a little screened-in side porch with a fireplace, grill and table that seemed so ideal for a summer barbecue. We didn’t bother getting the fireplace going though. We just kept toasty warm with the space heaters inside the main living area.

Although it’s easy to grumble about the lack of Wifi in this day and age, I was happy to be completely unplugged. Even though I don’t spend a whole lot of time on social media and surfing the web, aside from work-related stuff, I do feel so replenished from not constantly thinking about what I should be accomplishing or uploading or taking care of online.

Bright spots of color in a leaf-less forest

We had a little flatscreen TV with a handful of channels, but we hooked up Peanut’s protable DVD player and snuggled in for a few movies each night, then bedded down with our books until it was light’s out. So peaceful. Soooo what I needed.

The owners live on the same property as the cabin, but they were great hosts and not imposing whatsoever. It really felt like we had the place to ourselves, but that they were nearby in case we needed anything, which was quite reassuring.

They also had a small jungle gym and the most adorable play treehouse with toys in it that Peanut was allowed to soak up.

This boy sure enjoyed the place

Sunday, Peanut and I were up by 5:30, so we took in the sunrise together, wrapped up in a knit vintage blanket.

Backyard sunrise

This past weekend was Hubster’s birthday weekend, so we were celebrating him along with building upon our own fall family tradition. I explained a little last year about this tradition. As a kid, we used to go to a big family reunion at a cabin in the woods with all the food you could ever want in the world–turkey, ham, fish, mashed potatoes, and every other side you can think of. We would walk the trails and peek into the abandoned trailers and campers on the property. I remember the leaves were always changing and the cacophony of colors could make a person cry, they were so beautiful. Those weekends were hands down the best memories I have from childhood, so warm, so full of love, so relaxing. Due to family illness and other things, the reunions stopped one year and that was it. I miss that so badly!

Celebratory birthday spirits

Then, I thought, I can either be all “those were the days” nostalgic about the past or create my own family tradition to carry on since this was something I knew my heart really needed. Hence, the fall getaway weekend was born. This little hideaway nearly replicates those reunions with its rustic charm, tucked away location, room to roam, captivating scenery and relaxation factor. This year, I think we found our landing spot!

I have not edited this photo in any way. Gorgeous!
Small weekend trips have always been enough to completely recharge me, and this trip was no exception. We have no more travel plans until long after the holidays, but I plan to do a lot more of these small getaways next year.

If you’d like to read about how we travel so often on a budget, check out this post. I think I would add a bullet point about trying sites like HomeAway too for a good deal.

How was your weekend? Do you have any longings for the woods like I do?

Weekly Meal Planning

 photo 7a0e3606-0646-4e33-9c1c-ec30739425c2_zps0cc1fc6b.jpg

Breakfast:

  • Milkshake: 1 frozen banana + 1/4 c plain Greek yogurt + a dash of milk + 1 Tbsp peanut butter + water
  • Maple and Brown Sugar Oatmeal
  • 5 Egg Whites + a Pinch of Cheese

Snack: 

Lunch:

Snack:

  • Chickpea Salad: 1 can chickpeas + 1 chopped tomato + 1 small chopped onion + 1 chopped cucumber + 1 Tbsp olive oil + 1 Tbsp vinegar + 1 Tbsp lemon juice

Dinners:

  • We have grilled chicken, burgers, subs, and a frozen convenience meal (veggie-based, pretty healthy) on the menu for dinner.
PA202075
This menu makes me so excited. The Amazeballs are one of the best treats on the entire planet. They taste as amazing as the name suggests. It’s hard not to eat them all when I’m prepping them. The black bean stew just makes me feel all warm inside. It’s just like chili, but it’s super healthy. That full pot of color just makes me smile. I’ve had some serious cravings for maple and brown sugar oatmeal (you just can’t make it the same yourself), so Peanut and I each have a bowl of it in the morning. And a milkshake for breakfast? Um…yes please! It’s important to get excited about your food when you’re eating healthy. It makes all the difference in the world.

I tend to pack most of my calories into breakfast and the beginning part of my day. Reason being is that I work out in the mornings before work, so it only makes sense to pre-fuel and post-fuel. Then, I generally taper off the calories for the rest of the day. It feels much better to go to bed at night with a light belly rather than an over-stuffed one. The morning is when the metabolism starts rumbling and the evening is when it should start slowing down. My food patterns naturally mimic my metabolism.

I’ve been enjoying throwing together these random chickpea salads for snack. It’s almost become a weekly staple of mine. I just throw whatever veggies sound good together with a can of chickpeas. I wrote out above what I threw together this week. A clean dressing of olive oil, vinegar and lemon juice provides the perfect taste for almost any veggie mixture. That salad divides up among the five weekdays perfectly.

Our dinners often change, but we try to always have a rough schedule penciled out. I sometimes eat a little bit differently than my family does, perhaps subbing a Boca burger for a full-fat meat burger and a whole wheat bun for a pointless white one. This week, I’m going to try extra hard to stay out of all the snack-y things we have in our kitchen right now. It’s really throwing off my game.

What are you eating this week?

This Past Week I…

…went on a field trip to a pumpkin patch with Peanut and kept my three little Kindergarten charges safe and in line:) Took a legitimate nap afterward.
…carved pumpkins and roasted pumpkin seeds (I share with no one) with my family. Dremels are the best way to carve pumpkins ever!
…hosted my weekly Bible study in my home, after burning my nostrils with bleach and bathroom cleaner.
…dreamed of all the people we could have over for dinner now because our house is clean! Any takers?
…took Peanut on a Starbucks coffee/hot chocolate date because he was such a big helper with the cleaning. He cleaned the windows and did the dishes without being asked, without even the remote suggestion that he should help! Such a sweet boy.
…enjoyed my very first Starbucks Pumpkin Spice Latte. Why have I waited so long? Must.find.recipe to make this at home myself. Perhaps this one
…had a cookout at a family friend’s house, complete with backyard S’mores.
…had a huge family lunch with family that were visiting from Texas.
…acquired a brand-new roof in just one day. We had some serious issues that literally kept me up at night. *Sigh of relief.
…pushed through weeks 9 and 10 of the LiveFit Trainer.
…completed one entire portion of an e-book I’m hoping to launch in the near future.
…finished up a freelance writing job and a pro bono writing job that I took on.
…soaked up some really amazing content until I started to feel overwhelmed with inspiration!
…acquired some supplies for a brand-new fitness DIY project that I’ll be sharing soon on here. Giddy, giddy!
…received a body fat caliper I ordered in the mail. I’m totally geeking out on this nerdy fitness tool.

How have you been involved in your week?

Easy Budget Picture Collage Wall

I am not very good at following strict rules when it comes to home improvement-ish projects. There was no level or tape measure used in the making of this project.

I’ve had one sad little picture hanging on my dining room wall for, like, years that needed some friends. I started to put together a few framed pretties after framing Hubster’s anniversary card and ultimately decided to make a collage wall.

Photo

To begin, gather some of your favorite photos, art prints, and original artwork with repeating themes and colors. The frames should either be all light-colored or all dark-colored or somewhere in between. If your pictures include matting, the same rule applies–go with a monochromatic color scheme. There has to be some semblance of similarity or your wall will end up looking like a hodge podge–unless you’re going for that look:)

My framed pictures include one wooden anniversary card, one wooden owl card from Mackinac Island, my official NASM certificate, one thrifted 3D picuture, one free print from here, one painted leaf and one watercolor gift from a friend. I love how each piece has a history and story behind it from family trips to personal accomplishments to wedding gifts. Each one is totally my style too with a vintage/nature theme with lots of greens. The final product matches my record player set-up perfectly with its vintage-y vibe.

Wall prints
3D vintage print
The cutest vintage 3D picture ever!

Next, I took all my framed pieces and laid them out on the floor in front of the chosen wall. It took awhile to find just the right arrangement for the wall. The trick is to find a good balance. You want to balance the bigger with the smaller. I also had to balance the white and off-white art backgrounds. Keep all frames pretty close together with about 1-2 inch gaps in between. Add and take away frames until you find the sweet spot.

Wall Collage

Now, most professional collage-ers (whoever they are) will tell you to draw out the pattern on paper and get out the level to find the most precise angles. Well, I made this wall without doing any of those things. You may want to at least take a picture of your set-up to refer back to before you get started. I just eyeballed it. I memorized right about where one picture overlapped another and got to work. I’m not the type of girl who likes to fuss over things.

Finished Collage

Then, I just hammered away until they were all secure (which is really hard for me to do because I don’t like tainting perfectly smooth walls, even if they’re my own). You’ll want to be careful with the nails too, avoiding any electrical wires and ideally pounding the nails into studs. It’s nice when your whole family takes a hunting trip and leaves you with your whole house as your open canvas. Oh the possibilities!

vintage collage wall

Now, I really love walking past this wall. It really makes me smile. Oh yeah, and the best part? I only paid about $6 for this entire project. I paid 50 cents for the vintage picture and around $3 for each of the wooden cards. The rest of the items were gifted or free!

Other good gallery collage wall resources for those who like a little more structure:

How to Hang Art Groupings
Tips for Installing a Gallery Wall
Wall Art Guide
How to Create a Gallery Wall on a Budget
Eight Ways to Display Artwork on a Budget

DIY Jewelry Organization Makeover

My jewelry collection was an eyesore. Let’s just put it at that (you’ll see). I would forget about pieces buried in the bottom drawer of my jewelry shelf, all those necklaces had a tendency to get clumped together, and it just gave me a headache to look at it. Finally, in an attempt to make little spaces like this of my home environment more cozy and put-together, I decided to tackle the jewelry organization project head-on. With a little perusing on Pinterest, I put together some rough ideas of what I wanted the finished project to look like and headed to the thrift store.
I went through about three phases of putting this project together over the course of about a week, so I’m going to share those with you in case it provides some inspiration for you too:
Phase I
Thrifting a jewelry holder and giving it a makeover
Thrifted wooden spoon holder
What began its life as a collector spoon holder (I think??) is now the bearer of all my jewelry.
I went to the thrift store with the sole purpose of finding some old forgotten knick-knack shelf to repurpose, since they’re usually quite easy to come by. After perusing the correct aisle, I didn’t come across any that I was satisfied with. The selection was pretty picked over at the time I got there, so I went on my next mission in the store, to find some 16×20 frames. By chance, I returned to that original aisle again to return something I decided against buying and did one more quick sweep. This ugly gem was hidden under some other nondescript wooden things. It’s really made out of some quite durable wood and had that nice drawer on the bottom for earrings and such. Score!

After work the next day, I took a trip to the hardware store and stood a full 5 minutes in the paint aisle trying to decide what color I wanted this bad boy to be. I had green in my hand, but I was still debating. Our bedroom is green, but what if it didn’t quite match? I finally thought, why not make the jewelry shelf match some of the jewelry itself with a fresh coat of silver? While I was at the hardware store, I also picked out two drawer knobs and some ring screws to add to the shelf for extra storage.

Silver jewelry organizer
The finished product. A HUGE improvement!

Hubster helped me find the right screw length for the side knobs, but I did all the work! These knobs and extra screws on the bottom provide extra storage for longer necklaces and such.
Phase II
Cleaning the jewelry
While I was going through my jewelry, deciding what to keep and what to donate, I came across a few pieces I still really like but that have become quite tarnished with age. With a little research online, I decided to try lining a glass casserole dish with tin foil, sprinkling baking soda over the jewelry, and pouring water over the top. This worked for some of the jewelry, but I had to go back and rub toothpaste on a few items to really get them to shine again. No expensive jewelry cleaner required!
Baking soda and tin foil for tarnished jewelry

Phase III
Jewelry organization

In order to tame the chaos that my jewelry had become, I wanted the finished project to be as orderly and visually appealing as possible. The first thing I did was gather some silver cardstock from my scrapbooking collection. I made these nice earring cards by simply poking holes in the folded cardstock with a thick tapestry needle that I had, but I’m sure a safety pin would’ve done the trick. I absolutely adore how my earrings are all organized and easy to grab now. I can get a good look at them all with one quick glance. And none of them are buried in a mess, only to never be used again. In fact, today I’m wearing a pair of earrings I had forgotten I even had!
Next, I strung all my necklaces on the spoon holder thingies, which turned out to be great necklace holders. Hubster happened to have a nail that perfectly matched the silver shelf, so I used that to affix the organizer to the wall behind our dresser. Now all my necklaces are completely visible, making getting dressed in the morning quick and easy.


Before

It pains me a bit to even show this (bad lighting notwithstanding) “before” picture. It’s really unnerving to keep my jewelry in such a disarray. And you can’t even see the dust bunnies collected there. *Shiver*

After

Not only does my jewelry look much better, but now my collection of glass perfume bottles is also on display again. Those pretties were kind of shoved behind my jewelry shelf and piled on with…random things. Now they’re all out for show again, just as I like them.

I’ve been collecting these pretties since High School
Ah much better

I forgot I even had this little ring holder in all my mess of things. It came in handy since I didn’t really have any other viable, convenient place to store my rings. The ring holder came with a matching vintage mirror and brush/comb set that I have on the dresser too. The vintage “dressing table” theme suits me perfectly!

Jewelry Storage Idea
That’s a wrap! I feel much more comfortable in my room now that I don’t have to look away from my dresser. Tackling these small spaces in my home, one at a time, has done wonders on my comfort level. I am so completely satisfied with these results and pretty satisfied that I tackled this project all myself.

How do you organize your jewelry at home? I’d love to see pictures or hear about your solutions too.

Lately I’ve Been…

  • Sewing Build-A-Bear accessories for my Peanut’s stuffed animals. Those clothes get expensive and I found the perfect DIY projects online.
  • Fixing a workout bra that I somehow melted in the dryer. Didn’t even know that the fabric store carried bra hooks until I went looking for fabric for the above project. All I had to do was cut down the strap to the right size, burn the raw edges down with a lighter and sew the new piece on. So glad to have saved that one, since it fit really well. I’m mighty proud of my re-purposing skills on this one.
  • Re-seaming a thrift store T-shirt I found in college that I still like and has been sitting with pins in it for like 7 years. Ha!
  • Thrifting some necessary household items like 16″ x 20″ frames and some supplies for a jewelry storage makeover I plan on doing.
  • Spray-painting that thrifted shelving unit for my jewelry. I believe the wooden shelf I bought was once a spoon holder for collectors. Oh, you just wait and see what I did to it. I even went to the hardware store all by myself to DIY this one.
  • Hanging a collage wall in my dining room. I see these art displays in all my favorite home tours and decided to tackle one all by myself. It turned out sooo cute. I found this adorable $.50 vintage 3D picture that totally makes the wall. I’ll be sharing pictures soon.
  • Trying to keep my house from turning into a bachelor pad/frat house. Roomie just bought a beer brewing kid and a Soda Stream to add to my already cluttered counter space. Thinking of reworking the space a bit. This stuff doesn’t blend well with my vintage-chic aesthetic, as you might imagine.
  • Putting together bags of stuff to take to the thrift store. It feels good to get rid of more than we’re bringing in sometimes, especially when things start accumulating beyond my comfort level.
  • Registering for an EIN number with the IRS. I am now a registered business owner!
  • Eating soup alone at home while Hubster, Peanut and my Daddy-O go hunting. I’m really relishing this time alone.
  • Cleaning (finally!) one of the dreaded spots in my home. We have some high windows that accumulate spiders and webs and dust and ick. Whenever I clean it, I feel like the whole house is somehow much cleaner.
  • Making my bed with the brand-new quilt that I sewed. Can’t wait to share pictures of it on here soon. Just looking at it makes me happy.
  • Starting a new e-book project that I hope to launch on here in a few months. It’s in the baby stages right now, so I don’t want to share too much.
  • Buying tickets to the Sports and Fitness Expo being held in my town this weekend. Can’t wait!
  • Trying so hard to figure out how to connect my camcorder to my computer. I have a new cord on its way after a Radio Shack one didn’t work. I really want to add some workout videos for y’all. I may have to bite the bullet and buy a new, more laptop-compatible camcorder.
  • Dreaming up another trip “up-north” in October or November. I want to make this a regular tradition if we can swing it and Hubster can successfully get off of work. We stayed in Crivitz last year.
  • Writing up a job posting for the open pastoral position at my church. Since one of the committee members knew I was a writer, he thought I’d be the perfect person for the job. I like to help where I can.
  • Adjusting to having a child in all-day Kindergarten. Paying for hot lunches, meeting teachers, already dealing with bullying, packing snacks, collecting Box Tops, etc etc etc. I already get up at 5:30 to work out, run, and get ready, but we’ve somehow been running late anyway. This school thing is like a whole new world for me. However, I just love looking through the Scholastic Books order forms with him. I get all giddy like I did in school when those pamphlets come out. My wallet is never more open than it is for a Peanut who gets excited about reading and learning.

I think Chalene’s book was just the kick in the back end I needed to make myself even more productive than a Type-A person like me already is. I can’t believe all the things I’ve checked off my to-do list already. I use Wunderlist on my phone and it’s a true lifesaver and life improver, plus just seeing all the check marks I’ve accumulated already makes me happy. I have my to-dos broken down into “Today,” “This Week,” and “Soon.” Every day I try to do one thing to tackle one aspect of my priority list. For example, my home environment is one of my priorities. Therefore, many of the above listed items are helping make my environment more desirable from cleaning to small space makeovers. Another goal is setting up more of a solid personal training side business, so I am planning on networking at the Sports and Fitness Expo I signed up for and I finally signed up for an official EIN number (so simple to do, it’s pathetic). I’m taking steps each day to make this dream more of a reality. It’s really quite simple once you break it down into steps.

There’s something about fall that makes me feel like nesting. The little bit of chill in the air outside makes me want the inside to be the most cozy place my family could ever enjoy. Listening to the sound of Feist and blowing trees while tackling all these projects is just making my heart swell. I’ve decided that fall is officially my favorite season.

What have you been up to?