Home » budget

Category: budget

Washington Island Trip: Part One

This year, we decided to take our big family trip to Washington Island in Door County Wisconsin. We live pretty close-ish to this gem but have somehow never been there. This was the most last minute planning I have ever done in my life! We took our vacation days long in advance and knew we were going somewhere, but didn’t know where. We were going to do our regular trip to Wisconsin Dells, but Kayne broke his pinky and we didn’t think he’d be able to do a lot of the fun stuff in waterpark city. So, I considered Baraboo, I considered way “up north” somewhere, I considered home-sharing in Madison, etc. Hubster was pretty much fine with anything. I finally landed on Washington Island, and it was exactly the trip that we needed! It was full of relaxation and nature, the two things we needed most during this time.

On our way to the ferry, we made a pit stop at a rest area that turned out to be the halfway point to the North Pole!!!

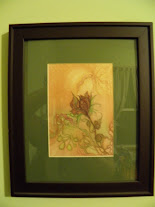
I also decided to start a weaving project on the car ride. You know, just cuz.

So, we started with our first ferry ride across the lake. None of us had ever been on one, so it was interesting do drive up, ride over the water and drive right off again. We made our way to our cabin, which I had reserved, sight unseen, because they didn’t have a website. It was the most adorable, charming thing I’ve seen! There was no TV and no WiFi, so we were forced to go unplugged, which was reeeeeeally nice. The cabin had a nice-sized living area with two bunk beds and a fold-out queen-sized couch. We set up a Pack N Play for Rayna. We had our own kitchen and bathroom with shower for a very reasonable price. It was nice because we could bring the dog and baby and not have to worry about our family’s noises bothering our neighbors or being too confined in close quarters. We also could prepare all of our own meals.

Cutest porch nestled in the trees
Our backyard!!! Even saw deer out here a few times!
Steps up to the house
They had the most beautiful property
and quaint little landscaped areas

Our hosts were so accommodating. They were so friendly and attentive to us. They live in a house on the property and rent out two cabins in their backyard. They invited us to a bonfire the first night. The wife even dug out a whole bunch of games for Kayne and played soccer and golf with him for at least a half hour. How sweet is that? One night, the daughter, who was visiting from Germany, even brought us over a yummy German dessert she had made from scratch that had a hint of a beer flavor. I wish I remembered what it was called.

Across the street from where we were staying, the owners owned a patch of land on the water with a peninsula where the swimming was fiiine. They even had a boat that they told us we could freely use.

Even the poochy took a swim
Look at that view!

We did a little bit of sightseeing the first day, just to get an idea of the layout of the island, and we went grocery shopping for the first few days’ worth of meals. That evening, we took a long walk down the road we were staying on. Saw a huge disgusting millipede! And all the mailboxes seemed to have these quirky little displays.

 I’m sure at one time this looked cute, but in its current condition, a bit creepy.
I was super surprised that the island wasn’t overly tourist-y. Sure, there were just a few requisite cute little shops, but for the most part, the island is all about experiencing nature, history and community. One of the shops was a lavender shop, but even that was based on local traditions and had a lavender farm attached to it. The town seemed to be populated more with locals than anything, so the experience was more authentic than “painted on,” if you know what I mean.
So, this was the beautiful introduction to the island that we had. Tomorrow, I’ll be back with Part Two of our trip with a few more details about the places we visited.

Weekend Getaway Retreat

I’m completely smitten with the little hideaway we found on HomeAway! If you were to talk to me in person about our weekend trip this week, you would certainly hear excitement come through in my voice. It was completely perfect in all the ways that I was hoping. It was isolated, in the woods, charming, simple, and close enough to home that if Hubster was called in to work, we could have driven separately. We were also close enough to a few small cities for gas stations and grocery stores when we needed them.

The cabin’s backyard!!!!

To give you an idea of our seclusion, the dirt driveway that took us back to the nestled cabin itself was 1/2 mile long. Oh yes! And one night, the road and ditches were lined with deer galore.

The property came with a grass airport landing strip, which we were allowed to roam, and miles’ worth of walking trails. Ponds, abandoned buildings, assorted birds, animal tracks, deer trails and all kinds of things greeted us on our hikes.

abandoned outbuilding

The cabin itself was the cutest little log cabin. We slept up in the queen-sized bed in the loft while Peanut camped out on the pull-out couch. We had a small kitchen at our disposal and a little bathroom. Just enough creature comforts while still feeling like we were truly getting away from it all. Just imagine the smell of bacon and eggs on the hot plate every morning…

View up to the loft

Loft ladder
Our queen-sized bed and skylight

Cutest little rustic details
Small cabin kitchen
Even the 12WBT series that I’m participating in had many recipes that were suitable for microwave or hot plate cooking, which was all we had, and all we needed. Turkey dogs, sandwiches and eggs with mushrooms were on the menu and completely 12WBT approved–and approved by my guys!

I soaked up hot chocolate and woodpecker watching on our balcony…I mean seriously, a balcony off of our loft bedroom! Can we get any closer to heaven?

Can you spy our two little birdie friends? I was laughing
watching them play through the birch trees like teenagers.

We even had a little screened-in side porch with a fireplace, grill and table that seemed so ideal for a summer barbecue. We didn’t bother getting the fireplace going though. We just kept toasty warm with the space heaters inside the main living area.

Although it’s easy to grumble about the lack of Wifi in this day and age, I was happy to be completely unplugged. Even though I don’t spend a whole lot of time on social media and surfing the web, aside from work-related stuff, I do feel so replenished from not constantly thinking about what I should be accomplishing or uploading or taking care of online.

Bright spots of color in a leaf-less forest

We had a little flatscreen TV with a handful of channels, but we hooked up Peanut’s protable DVD player and snuggled in for a few movies each night, then bedded down with our books until it was light’s out. So peaceful. Soooo what I needed.

The owners live on the same property as the cabin, but they were great hosts and not imposing whatsoever. It really felt like we had the place to ourselves, but that they were nearby in case we needed anything, which was quite reassuring.

They also had a small jungle gym and the most adorable play treehouse with toys in it that Peanut was allowed to soak up.

This boy sure enjoyed the place

Sunday, Peanut and I were up by 5:30, so we took in the sunrise together, wrapped up in a knit vintage blanket.

Backyard sunrise

This past weekend was Hubster’s birthday weekend, so we were celebrating him along with building upon our own fall family tradition. I explained a little last year about this tradition. As a kid, we used to go to a big family reunion at a cabin in the woods with all the food you could ever want in the world–turkey, ham, fish, mashed potatoes, and every other side you can think of. We would walk the trails and peek into the abandoned trailers and campers on the property. I remember the leaves were always changing and the cacophony of colors could make a person cry, they were so beautiful. Those weekends were hands down the best memories I have from childhood, so warm, so full of love, so relaxing. Due to family illness and other things, the reunions stopped one year and that was it. I miss that so badly!

Celebratory birthday spirits

Then, I thought, I can either be all “those were the days” nostalgic about the past or create my own family tradition to carry on since this was something I knew my heart really needed. Hence, the fall getaway weekend was born. This little hideaway nearly replicates those reunions with its rustic charm, tucked away location, room to roam, captivating scenery and relaxation factor. This year, I think we found our landing spot!

I have not edited this photo in any way. Gorgeous!
Small weekend trips have always been enough to completely recharge me, and this trip was no exception. We have no more travel plans until long after the holidays, but I plan to do a lot more of these small getaways next year.

If you’d like to read about how we travel so often on a budget, check out this post. I think I would add a bullet point about trying sites like HomeAway too for a good deal.

How was your weekend? Do you have any longings for the woods like I do?

Easy Budget Picture Collage Wall

I am not very good at following strict rules when it comes to home improvement-ish projects. There was no level or tape measure used in the making of this project.

I’ve had one sad little picture hanging on my dining room wall for, like, years that needed some friends. I started to put together a few framed pretties after framing Hubster’s anniversary card and ultimately decided to make a collage wall.

Photo

To begin, gather some of your favorite photos, art prints, and original artwork with repeating themes and colors. The frames should either be all light-colored or all dark-colored or somewhere in between. If your pictures include matting, the same rule applies–go with a monochromatic color scheme. There has to be some semblance of similarity or your wall will end up looking like a hodge podge–unless you’re going for that look:)

My framed pictures include one wooden anniversary card, one wooden owl card from Mackinac Island, my official NASM certificate, one thrifted 3D picuture, one free print from here, one painted leaf and one watercolor gift from a friend. I love how each piece has a history and story behind it from family trips to personal accomplishments to wedding gifts. Each one is totally my style too with a vintage/nature theme with lots of greens. The final product matches my record player set-up perfectly with its vintage-y vibe.

Wall prints
3D vintage print
The cutest vintage 3D picture ever!

Next, I took all my framed pieces and laid them out on the floor in front of the chosen wall. It took awhile to find just the right arrangement for the wall. The trick is to find a good balance. You want to balance the bigger with the smaller. I also had to balance the white and off-white art backgrounds. Keep all frames pretty close together with about 1-2 inch gaps in between. Add and take away frames until you find the sweet spot.

Wall Collage

Now, most professional collage-ers (whoever they are) will tell you to draw out the pattern on paper and get out the level to find the most precise angles. Well, I made this wall without doing any of those things. You may want to at least take a picture of your set-up to refer back to before you get started. I just eyeballed it. I memorized right about where one picture overlapped another and got to work. I’m not the type of girl who likes to fuss over things.

Finished Collage

Then, I just hammered away until they were all secure (which is really hard for me to do because I don’t like tainting perfectly smooth walls, even if they’re my own). You’ll want to be careful with the nails too, avoiding any electrical wires and ideally pounding the nails into studs. It’s nice when your whole family takes a hunting trip and leaves you with your whole house as your open canvas. Oh the possibilities!

vintage collage wall

Now, I really love walking past this wall. It really makes me smile. Oh yeah, and the best part? I only paid about $6 for this entire project. I paid 50 cents for the vintage picture and around $3 for each of the wooden cards. The rest of the items were gifted or free!

Other good gallery collage wall resources for those who like a little more structure:

How to Hang Art Groupings
Tips for Installing a Gallery Wall
Wall Art Guide
How to Create a Gallery Wall on a Budget
Eight Ways to Display Artwork on a Budget

Four Simple Goals Update

Things I always push myself to keep up with:

1. Tweezed eyebrows
2. Inbox, sent items, and deleted items all sorted away
3. Checking account balances
4. The stack of bill papers that need to be filed
5. Making the bed
6. Reading 15 mins to my son for school
7. Daily cleanup after son/hubster mess up the place.
8. Dishes
9. Updating my blog
10. Keeping up with phones and cameras full of pictures
11. Getting enough daily water
12. Getting up from my desk at hour intervals
13. Reading several chapters of the Bible
14. Planning out each snack and meal before work
15. Wiping up the counters
16. Keeping the stove-top spic and span (you can clean ANY of it with baking soda)
17. Three cardio and three strength sessions per week

…and on and on and on…

Sometimes I get so tied up in these small things that I forget to focus on the big things. Until everything is clean, I’m fed and watered, and my son has everything he needs for school the next day, I can’t concentrate on anything else. Maslow’s hierarchy of needs is in full effect once I get home from work. I’m trying to reach self-actualization, but get caught in the bottom two rungs most days.

How are you doing on your Four Simple Goals?

FourSimpleGoals

I am actually doing really well on the checking account thing. At first, I started out in bad shape, letting receipts pile up and transactions slip by (which is not like me at all). By now, I’ve been checking my account balance at least once a week and keeping up pretty well with the daily ebb and flow of the budget. It feels good to always know right where we’re at.

I also have been trying to keep up with all those little messy spots in my house. I can’t say I’ve been tackling one per week, but I am doing great things with my space. We recently got a new TV, which required a new TV stand. I got to choose an antique-looking horizontal dresser from the thrift store that fit everything I needed it to fit and doesn’t block the windows. A simple sanding and re-finishing (we actually had the right color at home) of the top and it was perfection! These small projects have given me much more breathing room. And I have to say, I’ve been taking loads of unneeded items to the thrift store and I haven’t really been buying anything new lately, so the house cleansing is balanced in favor of extra space.

The last two things I have admittedly not been very committed to. I do move around throughout the day at work, and I always walk on my lunch break, but getting up from my desk at certain intervals just seems anal. I’m ok with not being anal about this goal.

I have also been neglecting my Art Journal. I love the idea of an art journal, but there just aren’t enough hours in the day. Cliche, I know. But with all those expectations of myself that I listed above, art journaling does not get the attention it deserves. I also have a different, more purposeful journaling idea in mind that I want to tackle first.

Since I’m off of work now until after the new year, I will be setting my eyes on some new goals for the coming year. I am not the type of person that thinks the only time to plan goals is in on New Year’s Day. And I never abandon my goals by mid-January. I just think it’s a great time to evaluate the culmination of one year and use the accomplishments of the year past to perpetuate even better things in the coming year.

I will also be ordering an Etsy print and a new checkbook cover because I think I deserve them for dedicating so much energy to keeping our home and finances in order.

What are you New Year’s Resolutions? Did anyone else complete Elsie’s challenge?

Outdoor Movie Night Theme

Photobucket

A certain little boy turned four this week, and to commemorate this milestone, we decided to host an outdoor movie night for him and his tiny friends.

With a sprinkling of inspiration from Pinterest (of course!), we designed the party to be as fun but as low-maintenance and budget-conscious as possible. A few trips to the Dollar Store and we had ‘er made. On the list:

Red/white tissue paper
Alpha stickers
Theater-style candy (Twizzlers, Milk Duds, etc)
Popcorn
Kid-style party favors
Invitations
Red cups
Raffle tickets
Bottled water

Photobucket

To build the “concession stand”, we used a table and red and white tablecloth that we already owned. Then, we used Dollar Store tissue paper to create the background banners. The “Concessions” banner was as simple as cutting out triangles on a fold in the tissue paper, gluing them to a string, and attaching the appropriate letter stickers. The other banners consist of three sheets of tissue paper, folded in half twice and then cut and fringed along the bottom.

Photobucket

Photobucket

All theater-style treats were served in clear glass dishes decorated with red raffle tickets from the Dollar Store. We also wrapped the bottled water in raffle tickets.

We popped many-a-bag of popcorn. I found classic striped popcorn bags at a local party store. Goody bags for all the little guests were assembled with popcorn bags, playing cards, squirt guns and a few other do-dads. Mom made some puppy chow and we ordered a cupcake cake from Walmart. All set!

Photobucket

The movie played on a flatscreen we took from inside our house. This was in lieu of trying to source pricey projection equipment and erect a big white sheet. It worked out just fine. I recommend watching movies outside like this any time! We put out some blankets and seat cusions for comfy theater seating.

Photobucket
Photobucket

  Not only did Peanut enjoy his birthday, so did the grownups. Even grandpa.

Photobucket

A Thrifting Guide for Mommas on a Budget (Part Two)

Vintage Love
Welcome to Part Two of my guide to thrift shopping, filled with tips and tricks to navigate those beautiful, dusty aisles. If you haven’t already, check out Part One.

6. Think unconventionally. I’ve been known to buy large plaid men’s shirts to turn into toddler pants. Women’s nightgowns provide great yardage of satin material (because it can get expensive at the fabric store). Board games missing their pieces are perfect for recycling into wall art or jewelry. Those tacky wreaths can be deconstructed and remade into modern spring door decorations. Items do not need to serve their intended purposes—they can be made to serve yours!

For example, this vintage sewing basket makes a great corral for takeout menus and phone books.

thrift shopping

7. Don’t judge the bed by its coverlet. Similarly to the above, you can make almost anything suit your taste with a fresh coat of paint. Don’t dismiss furniture because of a few nicks and scratches or metal baskets because of an ugly shade of pastel. It’s amazing what sandpaper, a half-hour, and a small can of spray paint can do!

P9041043

8. Schedule the dates. Almost every thrift store has a special sale day of the week or month. Find out when they are and you might enjoy a ½-price discount. You may also benefit from knowing which days the store tends to stock up for fresh pickings. Be prepared to battle for personal space if you go on Saturday mornings.

Photobucket

9. Make sure you have a truck lined up. And make sure said truck actually has working brakes. Ha! This is especially true for rummage saling and flea market shopping. When you buy new patio furniture for $5, you need to find a good way to bring it home that won’t put anyone’s life in jeopardy. But seriously, this is your warning to have proper transportation at the ready when you find an amazing vintage dining room table for $50 that you can’t live without.

Photobucket

10. Iffy items. Now, I know some people who are completely creeped out by thrift stores. I think they think vintage stores are just teeming with all sorts of unsavory things and characters. The truth is, there are lots of everyday people participating in the equivalent of an indoor rummage sale. It’s not taboo anymore! That being said, there are some things you just can’t buy used (underwear, really???), and we all have our limits and that’s ok! Mine are shoes (unless they still have tags), underthings, anything with holes/pills/stains, pillows, and stuffed animals. I especially stay away from things that can’t easily be sanitized or washed.

Viewmaster

Thrift shopping isn’t the only way to nab unique deals. Other places to find one-of-a-kind steals: rummage sales, consignment shops, flea markets, antique stores, estate sales, and Etsy Vintage. I have barely bought a single article of clothing for my son for full price at a retail store. I mostly go rummage saling or get clothes from other people I know with boys. It seems illogical to me to spend $20 for an outfit that might be worn three times before it doesn’t fit anymore when I can buy a barely-used outfit for $1. We’ll leave those prices to the boy’s grandmas who like to spoil him, right?

I’m not a natural-born mall shopper, so I too like to buy my clothes on consignment or secondhand. That way, my style isn’t a regurgitated version of everyone else’s. I love the thrill of the unexpected, unusual and extra-special. And I loved these longs long before it became popular to pick through the thrift stores and resell items for a giant upcharge. To me, it’s more about clothing my family in a truly unique style on a shoestring budget. After all, that is exactly what those stores were created for.

I hope you are inspired to hit up the thrift store this weekend. What is your favorite secondhand treasure?

If you’re interested in learning even more, here are some other great vintage shopping articles that I’ve come across:

*An amazing post with sizing tips for vintage clothing
*Elsie also has a great list of thrift shopping tips.
*The Girls with Glasses have an inside-Goodwill video series to guide you through the aisles.
*Great comprehensive mother of all thrifting guide from a professional, Freckle Wonder: Part One, Part Two, and Part Three.

A Thrifting Guide for Mommas on a Budget (Part One)

Vintage Love

Thrift shopping is a great way to find cheap vintage clothing, housewares and other secondhand treasures.

My thrifting romance was nurtured from a very young age. Tagging along to the thrift store with my grandma was better than taking fistfuls of cash into the toy store. I never knew what sort of secondhand treasures I might find on any given day. My thrift shopping adventures have given me a keen eye for adorable vintage apparel and home goods on the cheap. I have also always felt like I was doing something humanitarian and eco-friendly by supporting thrift stores. I would say a good 75% of my wardrobe is of the secondhand nature, but you’d never guess. The best part is—I get to enjoy things that no one else has!

In this thrift shopping series, I will share my best tips for shopping secondhand on a budget:

1. Shop alone. Unless you can find someone who is just as content as you are with spending several hours rifling, examining, digging and scouring in a secondhand store, I suggest going it alone. I would also recommend leaving the kids at home unless they love it too. Forcing them is not good for anyone involved. However, in the unlikely event that you bring a toddler (because they’re screaming, holding your ankles, insisting on coming along), make the experience a fun, interactive (and short!) one, and make sure they’re well-fed and well-rested beforehand.

I recently had the best time with my Peanut lately at the local thrift store. Every time I tried on a leather jacket, he tried it on too, looking like a goofy mini Sherlock Holmes. I pointed out all sorts of things throughout the store and let him touch and hold some non-breakable items. Then, as a reward for being an angel child, we explored the toy section and even went home with a new little doctor kit. I’ve had my blood pressure checked a million times since then.

thrift shop adventures

doctor kit

2. Clear your schedule. If I’m going to scavenge the thrift store, I know that I’ll need to block off a good hour or two—and I better have a meal beforehand! There’s just no easy way to comb the clothing racks without enough time set aside. I know it will never work if I just decide to drop in for a quick 15 minutes. Do you know how unnerving it feels to think you might be missing something in all the aisles you didn’t have time to check? On the same vein, you need to be patient. You need the extra time to comb through racks and racks of distasteful nick-nacks to find those hidden gems. It really takes patience–and it’s not for everyone. It is not uncommon to only find one or two notable items for each 1-hour trip.

Photobucket

3. Start a list. The back page of my agenda book contains a constantly-changing list of things I’m looking for at the moment. If they happen to be items I can pick up secondhand for pennies, I’m always grateful. At the secondhand shop, in particular, I’m always on the lookout for craft supplies, vintage dresses, beautifully-illustrated children’s books, and pretty printed sheets to repurpose. But I might set out for a silky scarf for a project or dainty plates and mugs to turn into a tiered display. It’s helpful to have ideas of what you need for your home, so your attention stays focused. By bits and pieces, you’ll eventually craft some well-curated spaces in your home.

lists

4. Expect the unexpected. You probably won’t find anything on the list above on your first try. Always keep the list in the back of your mind, but keep your mind open. Most of the things I take away from the thrift store are things I never had on my mind. This is especially true for clothes. You cannot approach the racks hoping to find one specific item, but you might find three new things you would just die to have. And you probably won’t have to die for them at $1.00 each!

P9041042

5. Give and take. Every time I plan on visiting the thrift store, I take along a box of donations. I try to donate more than I buy to avoid the packrat trap and to keep the supply steady and flowing for others. Our needs and tastes are always changing, and this ebb and flow allows us to change things out of rotation every once in awhile without breaking the bank.

Photobucket

I hope this article is sparking some great ideas for you or just giving you that itch. I know that itch all to well. Even writing this article is making me itch for a trip to Vinnies.

Check back next week for Part Two of this thrift shopping guide for even more tips on browsing and unearthing some real treasures.

One Skein of Ribbon Three Ways

I love it when I visit the thrift store and snag pretty vintage ribbons. They don’t show up very frequently, but when they do… I swipe ’em.

Ribbon Skeins2, Thrift Store Ribbons

Not only are they pretty to look at, but they’re also great for sooooo many projects. I have used them as notebook binding with a little Modge Podge. I have glued them onto art journal and scrapbook pages. And I have also used them for the projects shown below. Let’s take this $0.25 skein and see how far it can go, shall we?

Vintage ribbon, Thrift store ribbons

1. The first thing I made with this, my favorite skein from the stack above, is a hair accessory holder. Most of my pretty hair pins were stuck in a makeup bag that didn’t see the light of day. I even routinely forgot and neglected what was in there! This was just a quick solution that I whipped up. It hangs from an adorable vintage towel holder in our bathroom closet.

Photobucket

All I did was take a length of the ribbon and fold it in half. Then, I hand-sewed two loops to both ribbon ends. I hang it folded in half so that I can loop my headbands through too (notice the burnt edge flower hairband). The ribbon is stiff enough that I can just slide my hairpins right on. I made the blue hairband and the top bow-tie clip. The second and bottom bow-tie clips were from Dainty Daisies. The big flower clip was from a now-defunct local store.

2. Ribbon headband: Remember how I told you that you could find hairband packs at dollar stores? This gray one came from one such pack. The bow is made by taking a small length of ribbon and either gluing or sewing the ends together to create a circle. Then, pinch the centers together and wrap with a coordinated ribbon. Sew the bow to the hairband and voila!

Ribbon hairband, Hairband made from vintage ribbon

3. Shower Ring Statement Necklace: I found this idea on Promise Tangeman’s blog. I connected three shower rings, wrapped ribbon around them, and strung them through a silver chain. Hot glue works just fine for holding the ribbon in place.

Photobucket

Fun, huh? And there is plenty…I mean plenty…of ribbon leftover. Let’s see where else this can take me.

DIY Envelope System

I needed an envelope system for the cash I regularly carry in my purse that was:

  • Not bulky–a girl’s purse is already a shoulder breaker
  • Organized–trying to keep all the money straight isn’t easy for a girl on a budget
  • Cute–has to fit the whole aesthetic of the purse, wallet, etc.
  • Easy to grab and go

I was concerned that the prevalent cloth versions on Etsy would get bulky and beat up in a purse. I was thinking, what could I use that has multiple pockets, doesn’t bend and is super-slim? Ah-ha, a pocket picture album! Dollar bills fit in 4×6 album pages perfectly. Keeping in line with said budget, the project is also super low-cost. Even a few friends have even adopted this great idea.

Supplies: heavy-duty scissors, contact paper/adhesive drawer liner, a 4×6 picture album, embellishments, 1 standard sheet of 12×12 scrapbook paper cut into six 4×6 sheets.

PA180079

1. Cut a piece of contact paper slightly smaller than the width/height of the album cover. Fold it in half about three times.

2. Cut the contact paper like those snowflakes you made as a child. You will need the heavy-duty scissors to cut through those thick layers.

PA180080

PA180081
3. Apply the resulting paper design to the cover. If you’ve found a vintage photo album that already has a beautiful cover, feel free to skip these first three steps!

PA180082
PA180083

4. Insert the scrapbook paper into six pages of the album. Feel free to use more if you need to.

PA180085

5. I used some leftover scraps of contact paper and a felt-tip marker to label each envelope: EAT, DUDS, POST, ENTERTAIN, SUNDAY, and SPEND. Be sure to label the outside of the picture sleeve or your greenbacks will cover up the label and you’ll waste time trying to figure out which pocket is which.

6. Embellish as desired. I didn’t want to add any sort of money symbols to the front cover so I could keep the wallet more “covert.” I didn’t want to make it very inviting for sticky fingers.

This project is a great way to prepare for all those upcoming New Years’ Resolutions or to keep tabs on your Christmas budget. I’ve heard it said (from financial professionals) that the envelope system is one of the best methods for keeping a budget, so I’m sticking to it. When the “out to eat” money is gone, it’s gone. But hey, I feel so excited that we even have an “out to eat” category in our budget now.

Featured on the Made By You Monday link party at: