Change your life in just one hour per day by building a business and plotting your exit from cubicle-land.
I am not very good at following strict rules when it comes to home improvement-ish projects. There was no level or tape measure used in the making of this project.
I’ve had one sad little picture hanging on my dining room wall for, like, years that needed some friends. I started to put together a few framed pretties after framing Hubster’s anniversary card and ultimately decided to make a collage wall.
To begin, gather some of your favorite photos, art prints, and original artwork with repeating themes and colors. The frames should either be all light-colored or all dark-colored or somewhere in between. If your pictures include matting, the same rule applies–go with a monochromatic color scheme. There has to be some semblance of similarity or your wall will end up looking like a hodge podge–unless you’re going for that look:)
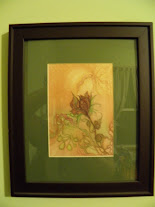
My framed pictures include one wooden anniversary card, one wooden owl card from Mackinac Island, my official NASM certificate, one thrifted 3D picuture, one free print from here, one painted leaf and one watercolor gift from a friend. I love how each piece has a history and story behind it from family trips to personal accomplishments to wedding gifts. Each one is totally my style too with a vintage/nature theme with lots of greens. The final product matches my record player set-up perfectly with its vintage-y vibe.


Next, I took all my framed pieces and laid them out on the floor in front of the chosen wall. It took awhile to find just the right arrangement for the wall. The trick is to find a good balance. You want to balance the bigger with the smaller. I also had to balance the white and off-white art backgrounds. Keep all frames pretty close together with about 1-2 inch gaps in between. Add and take away frames until you find the sweet spot.

Now, most professional collage-ers (whoever they are) will tell you to draw out the pattern on paper and get out the level to find the most precise angles. Well, I made this wall without doing any of those things. You may want to at least take a picture of your set-up to refer back to before you get started. I just eyeballed it. I memorized right about where one picture overlapped another and got to work. I’m not the type of girl who likes to fuss over things.

Then, I just hammered away until they were all secure (which is really hard for me to do because I don’t like tainting perfectly smooth walls, even if they’re my own). You’ll want to be careful with the nails too, avoiding any electrical wires and ideally pounding the nails into studs. It’s nice when your whole family takes a hunting trip and leaves you with your whole house as your open canvas. Oh the possibilities!

Now, I really love walking past this wall. It really makes me smile. Oh yeah, and the best part? I only paid about $6 for this entire project. I paid 50 cents for the vintage picture and around $3 for each of the wooden cards. The rest of the items were gifted or free!
Other good gallery collage wall resources for those who like a little more structure:
How to Hang Art Groupings
Tips for Installing a Gallery Wall
Wall Art Guide
How to Create a Gallery Wall on a Budget
Eight Ways to Display Artwork on a Budget