Home » cardio » Page 2

Category: cardio

How to Stay Fit on Vacation

Our family has taken several trips this past summer, including one that was an entire week long. Like almost every trip I take, I never put my health and fitness on vacation. No, it’s not because I’m crazy; it’s because it makes me a better, healthier person. Keeping up my running habit not only energizes me for a day of sightseeing, it also keeps me centered and happy.

How to Stay Fit and Active on Vacation
1. Bring a few supplies: and by supplies, I mean as simple as sneakers, workout clothes, a jump rope and resistance tubing. I don’t want you to haul all your dumbbells and fancy schmancy equipment along. Keep it simple and packable. If you’re bringing resistance tubing, you’ll want to find some easy resistance workouts that you can do anywhere. For cardio, a good pair of running shoes and/or a $1 jump rope is all you need to get in a good sweat session. You can even add 1 minute of jump roping between each resistance tube move to knock strength and cardio out at the same time.
2. Get up early: and by early, I mean earlier than 10am. No need to get up at 5am like you do at home (unless you want to), but earlier than your travel companions. Then, sneak in a workout before you even get started with your day. It will be much easier to tackle if you get it out of the way first. You won’t want to go for a run after a long day of sightseeing. Knock it out right away and feel that great feeling all day!
3. Scout out the trails, running routes and hotel equipment. Although hotel equipment can be pretty unpredictable (every treadmill is “out of order”), it can be a great option when it’s storming or cold outside. Many hotels nowadays have a workout room at your disposal. Do some research beforehand to find out what’s available and check customer comments about the conditions of the equipment. Even if you don’t have equipment at your disposal, you can always run outside. Use the user-created running routes on Map My Run to see where the locals are kicking up dust. Or check out American Trails to locate nature trails in your vicinity. I found a running trail when we were staying in Port Washington that now is part of one of my most cherished memories ever. I saw two deer and shared the magic of lightning bugs with my son for the first time ever. It was beautiful.
4. Build active activities into your itinerary. Obviously, Mackinac Island is navigable by foot, bike or horse only. We did a ton of walking out of necessity, just like on our Crivitz trip last year where we walked miles of trails to see all the waterfalls. But we also like to kayak, hike, swim, snorkel, and so many other active things. We naturally build many of these things into our vacation days. Take a walking tour, rent a bike, take para-sailing lessons, swim in the local lakes, just get out there! Vacations should naturally have an element of fitness to them already, so take advantage.
5. Eat out only once or twice. In a previous post, I discussed travelling on a budget. One way our family does that is by bringing or buying most of our food from local grocery stores. Not only do we save cash this way, but we also save our waistlines. It is much healthier to eat this way. Yes, splurge while you’re away from home, but only a few times, not for every single meal. Keep healthy snacks like bananas, trail mix and dry cereal with you everywhere you go so you’re less likely to binge when you’re suddenly stricken by severe hunger between meals.
6. Use what you have: in the Resources section below, I offer a link to a hotel room workout. It’s possible to get a sufficient workout in with only a chair, a wall, a stick and/or your body weight. Put together or search for a workout before you leave that involves the “equipment” that you have available to you. There is no shortage of workouts tailored to these types of conditions.
7. Borrow your kid’s portable DVD player: Peanut has a DVD player that I used in Chicago to do the Tracy Anderson workout that I picked up there. All I needed to work out was a chair! This is one super portable way to bring your home fitness DVD collection to good use out on the road. If you’re lucky enough to have a DVD player in your hotel room or cabin, you could trim even more from your luggage. If you’re bringing your laptop and it can play videos, you have yet another option.
Taking in sites on-foot is one of the best ways to navigate your destination. When you run through local parts of town, you will see parts of the city that you never would’ve noticed in a car. In Mackinaw City, I found some neat footpaths, took in gorgeous sunrises and learned the layout of the land much better during my runs. The trail below is one such path that I discovered while running. The city workers use it to get to their day jobs, but it made for such an amazing scenic running route. Peanut even went for a “run” with me on this trail. We had to stop a lot to track chipmunks;) Another beautiful memory.
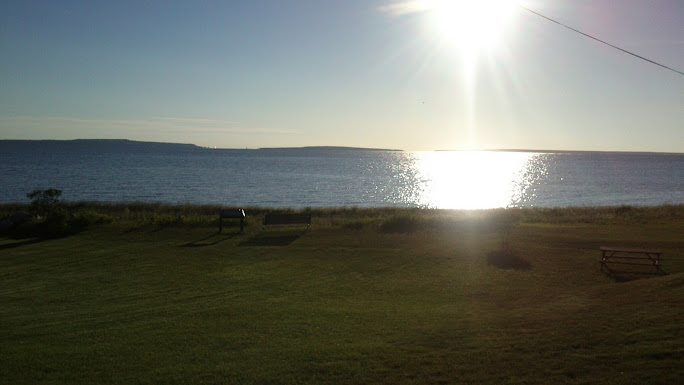
It’s hard to resist views like this on a run (Lake Huron, Mackinaw City):
I hope that these tips have made it easier for you to fit in fitness out on the road. It definitely is more than possible! Once you can find ways to eliminate the excuses for exercising, you can stay fit for life.
A few resources:
  1. I did this killer workout on YouTube while staying in Mackinaw City, MI. We brought our Google Nexus tablet and had free Wifi, so it worked out pretty swell. You could just do a search for “hotel room workouts,” and get thousands of hits like this.
  2. I always use the Runkeeper app to track my outdoor runs, including time, pace and distance.
  3. I also use the Spotify app while I’m running to listen to tunes, if I’m not surrounded by the lovely sound of waves and birds.
  4. Rubber tubing routines abound on the internet if you do some searching, like this great do-anwhere routine. I also like this Chady Dunmore one from a recent issue of Fitness RX. If the bodybuilders are using it, then it must be good, right?

Broomstick Full-Body Workout #2

Here is your third and final installment in my broomstick workout series. It is another full-body circuit that hits every major muscle group. You can also turn this into more of an interval workout, which I explain below. Or, combine the two stick workouts on days when you have more time for a real scorcher.

If you missed them, check out the other parts of this fitness series:
1. Workout stick DIY
2. Full-body broomstick stretch workout
3. Full-body workout #1

  1. Stir the pot: (a) Kneel with the stick out in front of you. (b) Push the stick out and around in a circle pattern, leaning your torso into it with control. Do 12 clockwise rotations and 12 counterclockwise rotations.
  2. Reverse crunch with curl: (a) On your back, legs up in tabletop, (b) perform a reverse crunch and bicep curl at the same time. Do 15-20 crunches.
  3. Curtsy lunge: (a) Stand with right knee and arms raised out in front of you. (b) Bring right foot back behind you and to the left into a lunge. Return to knee-up position. Do 12 reps per leg.
  4. Shoulder rotation: (a) Hold stick in right hand out to side, palm facing forward. (b) Rotate arm and stick until palm faces backward. Perform 25 reps per arm. You should really feel this one!
  5. Stick jacks: Perform 15 regular jumping jack with the stick in your hands.
  6. Inner thigh sweep: Stand on mat, holding stick vertical near the right thigh. Sweep the right leg across the body to the left, kicking the stick up with your foot. Perform 12 reps per leg.
  7. Deep squats: Holding the stick in front of you for balance, feet shoulder’s width apart, drop your butt down into a deep squat. Return to standing, squeezing your glutes as you come up. Do 15 squats.
  8. V-step: With your stick laying vertically on the ground, perform a V-step, stepping over the stick. Feel free to put a little jump into your step:)

Remember to do a good stretch after this workout. You can even use your stick to do so with my Broomstick Stretch Workout. To turn this workout into even more of a fat burner, you can pull out the Stick Jacks and perform 25 of them in between each strength move.
I hope this workout series has inspired you to work out a little differently. You can get quite an effective workout using simple household objects, or even just your own body weight.
I will continue adding FlashFit workouts and other series as I design them, so I hope this is the third workout in a long series to come! 
For more free workouts, sign up for updates in my sidebar. Either sign up by email, through Bloglovin’ or through Feedly (or another feed burner).
Disclaimer: I am an NASM-certified personal trainer, however I cannot be with you in person to assess, check your form or guide you, so please remember that these workouts are done at your own risk. As always, check with your doctor before beginning this or any other exercise program and always honor your body’s abilities and limitations.

Jillian Michaels Hard Body Review

I was killing some time at a two-story Target in Chicago, waiting for Hubster to pick me up after my NASM workshop. I perused the workout section and was a little hesitant to pick up this video. I have three of Jillian’s videos already, and sometimes they can be a bit repetitive. But it was only $10, so what difference does it really make, right? Plus, Hubster had bought himself something from me for our anniversary, so I decided to buy something for myself from him. Old married people, I tell ya. I put this DVD and Tracy Anderson’s Mat Workout (the only thing related to her that sells for $10!) in my cart. I have to say I’m pretty happy about this purchase, because Jillian really mixes things up in this series.

Let’s break this down:

The video consists of two levels, 45 minutes each.
These were my stats for Level One:
Heart Rate: I averaged 130bpm and stayed inside my target heart rate zone for 21 minutes.
Calories: 527 (based on my body weight, exertion level and heart rate)
Pros:
  • In each circuit, there are three versions of most of the moves. One model shows the basic move, one model shows the intermediate move, and Jillian sometimes chooses one model to take it up to the advanced level. Given the three levels of the moves within the two levels of the workout, there is plenty of room for growth.
  • The moves are mostly compound moves, hitting multiple muscle groups at once. For instance, there’s one move where you perform a sumo squat with a calf raise and shoulder press for a total-body hit. You get a really effective workout in a short-ish amount of time because you’re targeting more at once. I never once felt like I wasn’t getting anything out of a move.
  • Like the back panel states, Jillian finally uses some fresh new moves, even some that I’ve never seen before. Such a relief! This coming from a person who gets bored with workouts quite quickly.
  • Jillian is always great about giving proper exercise form cues. She stops to point out different aspects of the exercise on her models, which is really helpful especially when working out at home.

Cons:
  • The only drawback I really saw with this video is the scant amount of stretching at the end of the workout. I would suggest doing quite a few more stretches after these workouts, holding each stretch for at least 30 seconds. 
  • I would also be hesitant to suggest this video for beginners. You can modify most of the moves, but it might be a bit too much for someone who is just dipping their foot in the fitness-spiked water. Something like Barefoot Cardio would be a much better option for a beginner.

Bottom line: If the 30 Day Shred feels tough to you, this will feel tougher.
My favorite motivational sentiment from Jillian in this video is her encouragement to dig deep, to think about what you’re doing this all for. She says to think about why you’re here and let that motivate you. It really is important to reflect on that to keep your athletic spirit from waning. 

Thanks Hubster for the Anniversary gift. You’re the best:)

Tracy Anderson’s mat workout is up next. I hope to share a post about that too, just as soon as I can.

*This post is based only on my opinions and results. I was in no way compensated for this post, I just thought it was a great DVD to share.

FlashFit Workout #1

I can hardly wait until next week when I share my first broomstick workout with you. Since I’m so eager, I thought I’d publish a different workout in the meantime.

My lunchtime workout buddy and I, who hit up the gym every other day at lunch, were doing these workouts before we started training for her upcoming Tough Mudder. My partner wanted something that was hardcore, where we really felt like we did something for the 15-20 minutes we have to work out (hence, the name FlashFit). So, I designed this workout, which switches back and forth between strength and cardio. You’ll do each move for 1 minute, moving right along to the next. I also made sure that we were working every major muscle group using mostly compound moves, to use our short time at the gym more effectively.

I’ve been designing so many more of these FlashFit in anticipation of picking up a teaching slot at work. My amazing workplace offers exercise classes at lunch and after work and I’m on the waiting list to pick up a slot as soon as one becomes available. Hopefully, I will be able to post many more of these soon, so hop on over to my sidebar to subscribe so you don’t miss any:)

You can access the printable PDF file here. There are two different page designs for this workout, because I was experimenting with some publishing software. I personally like the second page better (above), but print whichever one you prefer and take it to the gym with you.

Report back here about how you enjoyed the workout and how challenging it was for you!
If you have any questions about how to do the moves, leave a comment and I’ll get back to you as soon as I can.

P.S. This workout is not for everyone. I designed it especially for myself and my workout partner, so please take into consideration your own skill level. Please consult your physician before beginning this or any other workout program. And as always, honor your body’s abilities and limitations.

Weekly Workout Rundown

 photo 0e340d3e-62ba-4e55-9f4a-7258f16cd99a_zps3484b587.jpg

I just noticed I didn’t post my workouts for the week. Here is last week’s workout rundown:
Monday: 
Tuesday: 
  • 35 min AM run, 2.7 miles
  • 30 min casual walk at lunch
Wednesday:
  • 35 min AM run, 2.9 miles, my 30-20-10 plan
  • 30 min, Supreme 90 Day Legs at lunch
Thursday:
  • Rest
  • 30 min brisk walk at lunch
Friday:
  • 35 min AM run, 2.5 miles
  • 25 min Maybe Mudder at lunch
Saturday:
  • 60 min run, 5 miles
Sunday:
  • Rest
  • 20 min casual walk

Well, next week, I think I’m finally going to try Jamie Eason’s 12-week training plan. I like to try different plans every now and then to get my body wondering, try new workouts, and keep from being bored. I’m going to have a really hard time giving up cardio for those first two entire weeks though, so we’ll see if I cheat on that:) I’ve been quite the cardio queen for awhile now, so it’s time to work on my muscular development for a bit. I am a born runner though, so I’m sure I’ll have to sneak a little of it in. I don’t want to lose all the endurance I’ve built up for that either. But I’m looking forward to training my body in a different way.

Right now, I’m trying to get through all the reading, organize the print-offs, and put together a menu plan. This plan definitely requires some pre-planning and preparation. However, it really breaks everything down for you so you don’t have to wonder about anything. There are recipes, food group breakdowns, exercise guides, daily tips and so much more. It’s a wonder, with all the work that went into the plan, that it is absolutely free!

How are your workouts looking this week?

Weekly Workout Rundown

 photo 0e340d3e-62ba-4e55-9f4a-7258f16cd99a_zps3484b587.jpg

Monday:

  • Rest

Tuesday:

  • 40 min AM run, 3 miles
  • 10 min Tahiti Tush workout
  • 15 min circuit workout that I devised

Wednesday:

  • 40 min AM run, 3 miles
  • 30 min brisk walk at lunch, 2 miles

Thursday:

  • 30 min walk at lunch, 1.5 miles
  • 18 min Santorini Bikini, three rounds
  • 15 min Bikini Strap workout, three rounds
  • 7 min Sunkissed Abs

Friday:

  • 35 min AM run, Itty Bitty Cardio, 2.5 miles
  • 15 min arm workout from the Beach Babe DVD

Saturday:

  • 62 min run, 5 miles

Sunday:

  • Rest

All the Tone it Up workouts can be found on their weekly workout schedule.

Did you see that little note on Tuesday? Yes, I did, for the first time, create my own circuit training cardio workout. I will have to share this workout on here soon. I tested it out first, and let me tell you, there was a lot of sweat dripping off of me. My workout buddy said she wanted something super effective during our 20 minute lunch workouts. What we’ve been doing just isn’t cutting it for her. She likes hardcore workouts, so that’s what I’m giving her, complete with bursts of cardio. Wonder if she’ll regret asking;)

I’m up to 59.5 miles for #100bySummer as of today. Hopefully I can pull off 100 miles by June 21. I’m over halfway there, so I should be able to. Let’s re-phrase that. I am going to!

This coming weekend, I’m headed to Chicago for my NASM personal trainer workshop. I can’t wait to share my experience with all of you–both the Chicago experience and the workshop experience. I can’t wait to go! It’s getting down to the wire, my friends. I have until the first week in July to take the test. Wish me luck on these final days of studying!

Barefoot Running Review

I recently picked up The Barefoot Running Book by Jason Robillard from the library (where else?). Like so many others, I became interested in barefoot running after reading about the concept in Born to Run. Turns out, the book is a fascinating read that I recommend to all my fellow runners or runners-to-be out there. The arguments for running barefoot are quite staggering.


Barefoot Running Research

Take, for example, the studies explored in the beginning of the book. They seem to suggest that running in old, worn out, cheap shoes is the best for running. The closer to barefoot you get, the better for your body. The modern cushioned running shoe has led to a higher injury rate. Absolutely no studies indicate that they’re any good for you. In fact, the total opposite is true. One study of over 5000 race finishers shows that “those who ran in expensive shoes (costing more than $95) were more than twice as likely to have been injured in the past year than those who ran in cheaper shoes (costing less than $40).” See page 6 for this fascinating research.
 
Treadmill Barefoot Running
 
Some takeaway tips and tricks that I will be incorporating into my own training are these:

1. On page 104, Robillard suggests that “a necklace can be a handy training tool. As you run, the necklace should remain more or less stationary around you neck. If it bounces up and down, you are probably over striding. If it sways side to side, your upper body is moving too much or your arms are moving across your body.” I love this simple way to tell if you’re running with the correct form. Unless I have someone following me who is trained in critiquing running form, how would I know if I was doing it correctly? I might feel as though I am running efficiently, but, on my own, I am always uncertain about the correct posture. A necklace! Simple  as that.

2. You should practice running in short, quick strides. One way to train yourself to take short enough strides is to set a metronome to 180 beats per minute and keep pace. Reason being that shorter, softer, less vertical movement uses less energy than big vertical movements. Also it’s helpful to focus on lifting the foot versus landing. This way, you’re always thinking of elevating, creating lighter footing.

3. Robillard also offers another handy nugget about proper posture with this super simple exercise. Raise your hands over your head and stretch upward. The posture that this leaves you in is the best posture for running. I have routinely stopped myself on the treadmill when I have felt myself slumping and perform this exercise. It really brings awareness back to the correct body posture.

I have tried a little bit of barefoot running on my home treadmill. I can’t wait to try it out this summer on the sidewalk, as the ground is like permafrost right now in Wisconsin. That’s right–the sidewalk. Robillard emphasizes the efficiency of running on concrete. If you see a goofy blond running around sans shoes, now you’ll know the backstory.

And I’ll leave you with some handy resources reiterated several times throughout the book for further exploration:

Chi running
Kemme Fitness
Evolution Running
Good Form Running
Pose Method
Barefoot Running University: Robillard’s very own website

Have you jumped on the barefoot running train yet? Would you ever consider running barefoot?

Tone It Up Plan and Love Your Body Update

I finally did it! After all the time I’ve known about Tone It Up and wondered about the Nutrition Plan, I finally bought it. It took the Cyber Monday deal they were offering (and some nicely-timed bonus money) to finally push me over the edge. I got a TIU hat, water bottle, journal, Beach Babe workout DVD, packet of PerfectFit and a TIU decal for ordering that day. You know me, I’m always searching for a good deal! But really, I’m so glad I finally did it. I didn’t quite know what I would be getting, but it’s well worth it.

Embedded image permalink

First, with the wealth of health information and recipes out on the web, I didn’t think I really needed to spend a significant amount of cash on this plan. However, once I got the plan, it was much more helpful and organized than I could have probably mustered on my own. You are given plenty of recipes and meal options for all six “meals” of the day. Plus, the girls have certain food groups timed throughout the day for optimal metabolism-boosting and sports performance. Every new season brings along new updates to the plan–all included for free! It’s super exciting whenever a new update comes out.

The emphasis of the plan is on Lean, Green and Clean foods. In other words, “real” foods or the closest to nature-made foods as possible. So far, I’ve noticed that when I eat on this plan for a week and then indulge in “unreal” foods for one meal (i.e. taco or burger + cookie), I get a stomachache. I guess that could be a good incentive to keep eating as healthy as possible. This is how we should be eating all the time anyhow, so I don’t consider it a “diet” per se.

You can tell that Karena and Katrina put a ton of work and manpower in putting the plan together. Plus, once you’re part of the team, you’re really part of the team. There are so many special “members-only” perks and challenges that once you sign up, you finally feel like part of the TIU “in crowd.” I didn’t quite realize what I was missing until I went all-in.

Embedded image permalink

This week kicks off the Love Your Body series and I’ve been doing everything they tell me to and then some. Here’s a breakdown of what we were supposed to do to prepare.

List 5 Things I Love About My Body

Embedded image permalink

*I should’ve added: “Strong pain tolerance.” I am so thankful for that. This was a tough exercise to do. It was hard to come up with five things and it felt vain, but really, it’s good to be thankful for what our bodies can do. I guess I’m also thankful for strong lungs, powerful abs (my baby doctor almost didn’t make it in time), and a kick-a$$ immune system.

Fitness Goals for 2013

Embedded image permalink

Whoa whoa, what’s that you see? Become a personal trainer? Yep, it’s on my list of things to do before I turn a certain age (ahem) in June. NASM it is! I’ll keep you posted. I guess since I’ve finally written it now, it must happen right? Good incentive.

Workouts so Far

Monday: Rest day

Tuesday: 40 minute Tabata Inferno on the Supreme90Day system + 20 minute barefoot treadmill run (we’ll talk more about this later).

Wednesday:

  • AM: 35 minute shoulders and arms on Supreme90Day
  • Lunch: 30 min brisk walk w/ friend
  • PM: 45 Cupid’s Cardio interval run on treadmill w/ friend.

Thursday:

  • AM: 40 minute Cardio on Supreme90Day + 1 mile walk to work (in 20-degree weather)
  • Lunch: 30 min brisk walk with mom and sis
  • PM: 1 mile walk home + TBD

I already have plans to go with another friend to the gym tomorrow (Friday) at lunch for strength training along with cardio in the morning.
Pre-planning + Recruiting Friends = Success.

Love-Your-Body-Challenge-Tone-It-Up-ToneItUp-LoveYourBody

How are you doing so far this year? What are you Fit Goals for 2013?

Walking Mantra Meditation

Since I’ve been delving into the land of mantras, I thought it would be fun to talk about walking mantra meditations. Now, I’m not a huge meditator. I know all about how good it is for you, and I always have good intentions of meditating, but the practice of silent meditation often falls to the wayside.

After reading an article about walking meditation by friend Nancy Monson, I decided I really like the idea of walking and meditating at the same time. After all, I walk to work a lot, and what’s better than multitasking while doing it?

One day, on my way home from work, I selected a word to focus on for the entire trip. The results were actually pretty amazing. Focusing on the word “beauty” made so many lovely and heartwarming things stand out to me. I had covered the non-picturesque territory so many times before, I didn’t think anything would really strike me as particularly beautiful, but I was wrong. Turning a simple walk into an opportunity for awareness, wellness, and gratitude is just genius to me. It makes every walk quite a bit more special.

I noticed a squirrel carrying a whole corn cob (funny!)
A sign for “Pleasant Street”

A family decorating their Christmas tree in front of the window (so special!)

Particularly aesthetically-pleasing arrangements of apartment electricity lines (weird, I know!).


And interesting architectural details

And I really can’t believe I never noticed this adorable bird treehouse display after living in the same neighborhood for over 7 years!!! It’s amazing what you pick up on while you’re being intentionally mindful.

tree full of bird houses
OLYMPUS DIGITAL CAMERA


This type of walk was so energizing, I plan on doing it much more in the future.

I’ve taken walks before where I focused on how fast I was going to the point that my face got really tight. I’ve taken walks where I focused on a recent fight and used the walk to get away from home, process what happened, and prevent welling rage from erupting. This idea of a walking meditation is much more pleasant and productive, don’t you think? And why would you ever take another walk again without focusing on what’s truly beautiful? Just another simple way to turn an ordinary everyday task into something a little more special…

Try it! And then leave a note to tell me what you think.